

At the request of one of the Super Moderators on this forum I am posting a restoration thread on my 1970 Yamaha R5 350. I hope all of you enjoy this trip with me. This restoration took place in November and December of last year.
Here it is in it's entirety - spaced out with a few days in between each post . . . :wink:
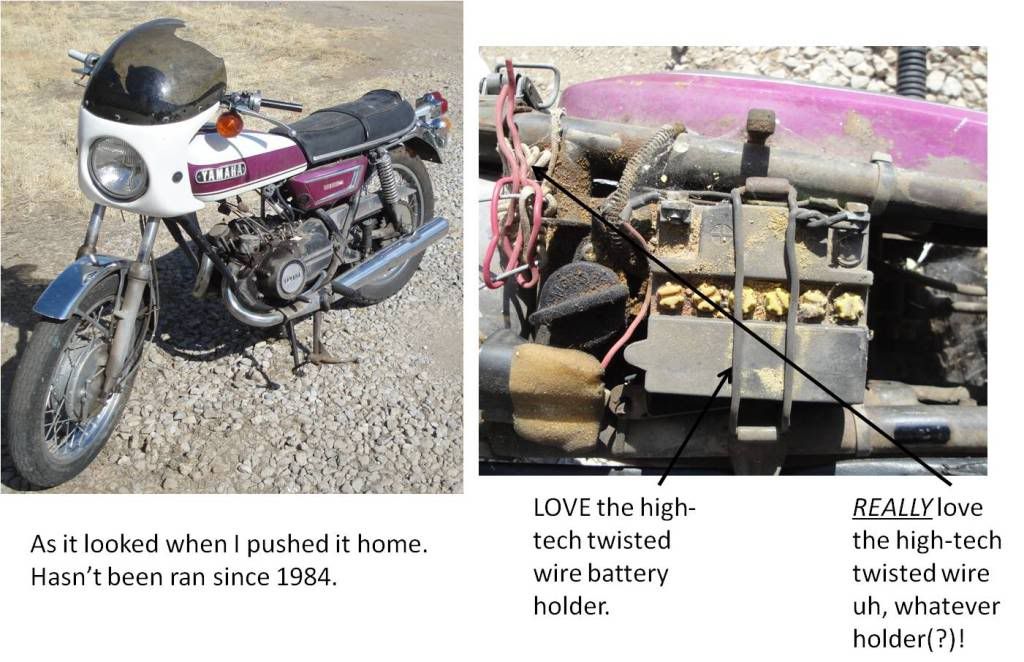
Hi Folks,
I'm new to the forum and thought I'd like to share my adventures with like-minded Yamaha enthusiasts. I recently picked up (free) a totally trashed 1970 Yamaha R5 350. I've always wanted to own one of these and jumped at the opportunity. I am a 30 years of experience (now retired) mechanic and really enjoy the challenge of the restoration. I've attached some "Before" photos and will keep updating the thread with progress pictures.
![Image]()
![Image]()
![Image]()
Here it is in it's entirety - spaced out with a few days in between each post . . . :wink:
Hi Folks,
I'm new to the forum and thought I'd like to share my adventures with like-minded Yamaha enthusiasts. I recently picked up (free) a totally trashed 1970 Yamaha R5 350. I've always wanted to own one of these and jumped at the opportunity. I am a 30 years of experience (now retired) mechanic and really enjoy the challenge of the restoration. I've attached some "Before" photos and will keep updating the thread with progress pictures.


 It turned out that the lead weight in the counter balance part of the crank somehow came loose and moved into the little space where the rod rotates. After various consultations, I decided to drill a small hole through the crank and into the lead portion. I countersunk the hole and then put a flat-head screw in to hold the lead in place. I then welded the screw in so it would NEVER come loose. I filed it down so it's smooth and has the same clearance it had before. Cool. More updates coming . . .


